 Truck / SUV
 Jeep®
Jeep®
 Restoration
 Stock Replacement
 Late Model Muscle
 Tools
Tools
 Gifts, Clothing, & More
 Circle Track
 Street Rod
 Powersports
 Paint & Body
 Marine
 Jr Dragster
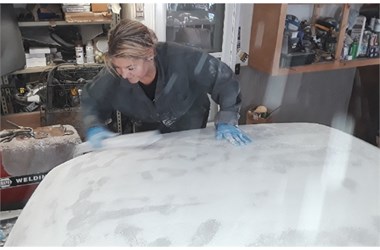
In this second installment of The Kat Jones Studebaker Project, our heroine dives into the nitty-gritty of bodywork in the quest to transform a 1954 Studebaker Commander from a roller into rolling art. Ms. Jones talks about finding hidden surprises, welding and grinding holes, applying filler and primer, and sanding—lots and lots of sanding. Makes our hands sore just thinking about it.
You can find Part One of the Kat Jones Studebaker saga here.
When most people see a beautiful car and admire the paint, they have no idea of the work involved in the process. My reality is that I am in a one-car garage in Buffalo, New York. It’s cold, it’s snowing, and we need food, heat, and the lights to stay on. It’s hard to plan out your paint scheme and stay within your budget.
But it’s not rocket science either—properly prepping the car’s metal is the key to a great paint job. Metal prep is not expensive, but it is hard work and time-consuming. As my mentor once told me, prep it once for you, once for me, and once for everyone else. I think he forgot to mention the other three or four other prep steps.
Stew came with a coat of black primer on most of his sheetmetal, but there were issues under that thin layer of color. I also wanted the body smoothed, which meant welding and grinding the holes for the door handles, trunk handle, and emblems. The entire body was also acid-etched to prevent flash rust from forming.
The next step was to apply a skim coat of body filler where needed and sand. And sand again. Then spray primer and sand some more.
The lesson is, prep your surfaces the best you can. Think about it--when you’re painting you are depositing a very small amount of color, and shoddy prep will show right through it. I am going with a dark color, so I know all of this prep will pay off. And as much as I hate sanding, seeing the body looking good in a second coat of primer made the effort worthwhile.
Lesson two--if you have anyone in your life who likes to block sand, capture them and never let them out of the garage.
With the prep work done, the body looked good. It was blasted. It was metal-prepped. It had primer on it. I mean, it looked GOOD.
No so fast there, Kat.
While I was hanging the doors, I ran my hand over them and realized there were low spots and oil canning. I tried to fix the issues without stripping the primer. No go.
So, it was back to those basics—stripping the doors down to the metal and fixing them properly. I discovered the previous owner(s) just added body filler instead of repairing the metal to make them smooth. The problem is, the metal will flex and when I go to paint the doors, that filler is going to crack. Mud is a quick fix, but it is merely a Band-Aid. Repairing the problem properly will save you time, effort, and money in the long run.